こんにちは!竹内です!
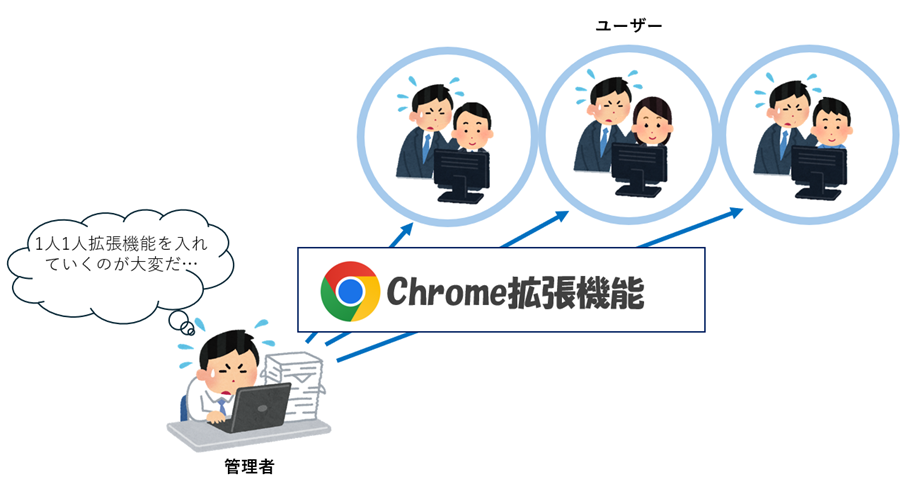
会社で社員のデバイスにChromeの拡張機能を入れたいと思っても、手動でのインストールはミスが多く、何より管理者の工数が恐ろしいですよね。
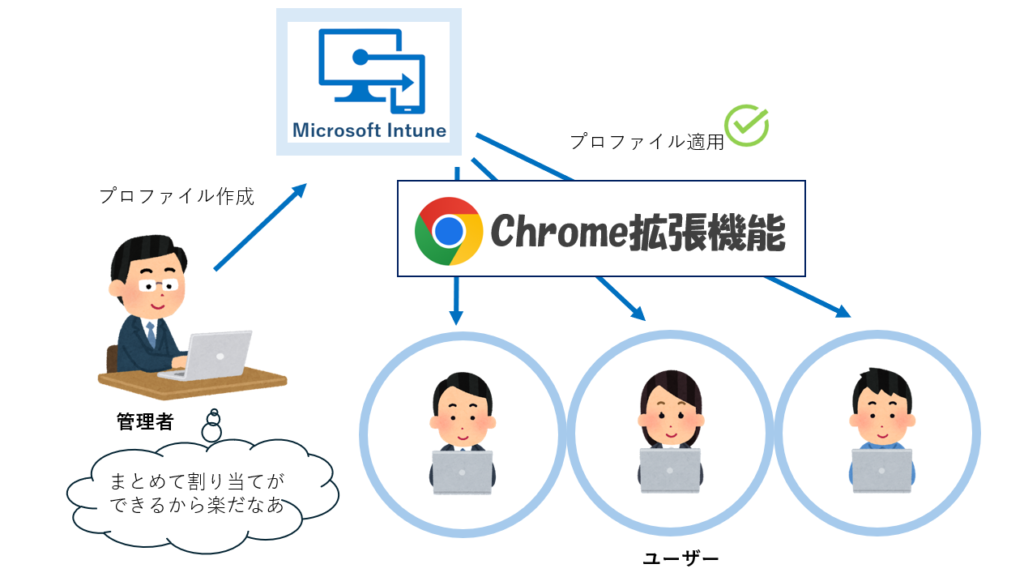
そこで今回は、Microsoft Intuneを利用してGoogle Chromeの拡張機能を自動的に追加・管理する方法をご紹介します。この設定を行うことで、手動でのインストールの手間を省き、セキュリティリスクを減らすことができます。
この記事では、具体的な設定手順を解説していきます。Intuneを使いこなし管理を効率化していきましょう!
<手動で個々ユーザーに設定する場合>
<Microsoft Intuneを使って自動で設定する場合>
目次
1.IntuneでChrome拡張機能を自動追加する手順
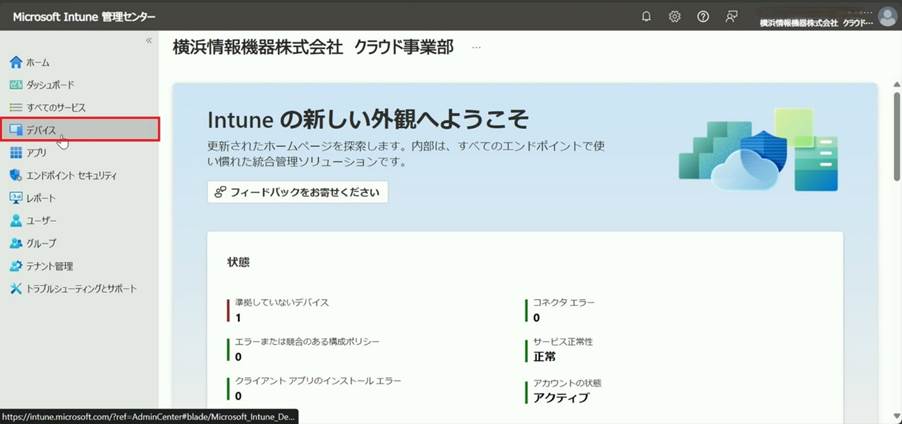
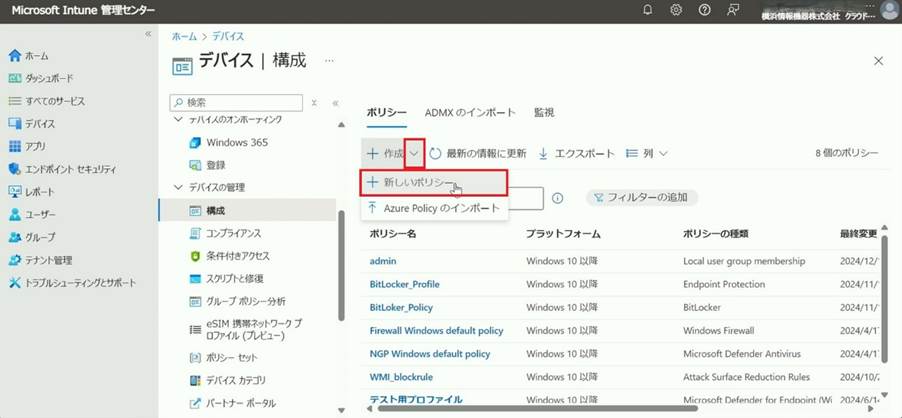
1.Microsoft Intune管理センターを開き、メニューバーから「デバイス」クリックします。
2.「構成」をクリックします。

3.「作成」のプルダウンより、「+新しいポリシー」をクリックします。
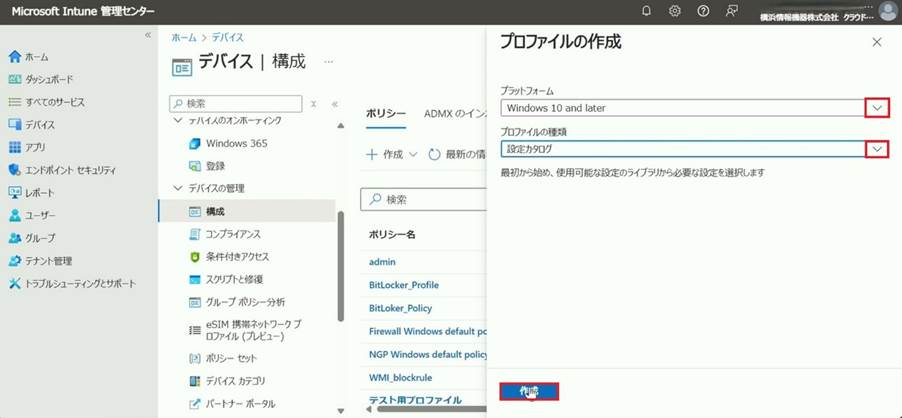
4.「プラットフォーム」のプルダウンより、「Windows 10 and later」を選択し、「プロファイルの種類」より、「設定カタログ」を選択し、「作成」をクリックします。
5.「Name」(日本語表記:「名前」)にポリシー名を入力し、「Next」(日本語表記:「次へ」)をクリックします。
※ここでは「検証_Chrome拡張機能」と入力します。

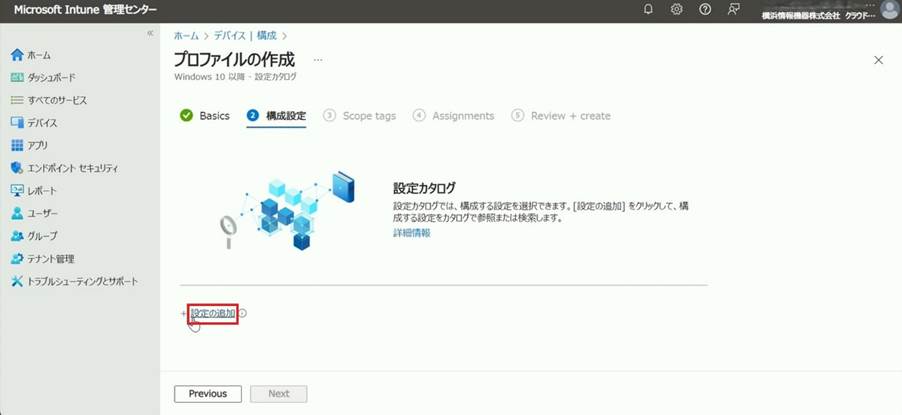
6.「設定の追加」をクリックします。
7.検索欄に「Chrome」と入力し、「Browse by category」(日本語表記:「カテゴリ別に参照」)より、「Google Google Chrome 拡張機能」を選択します。
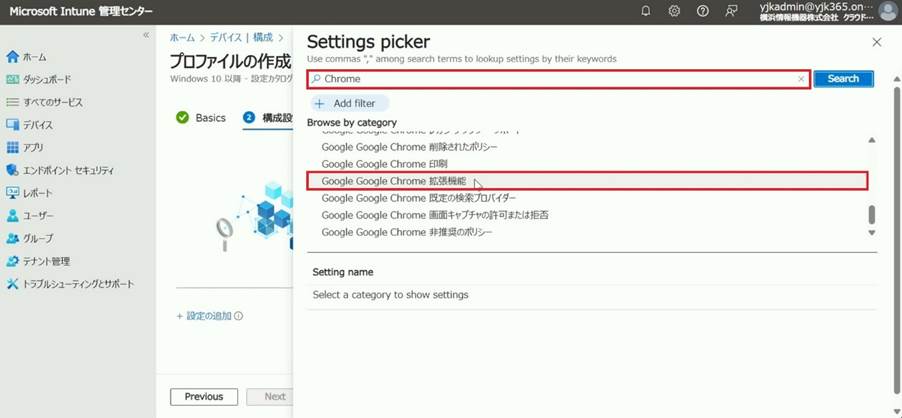
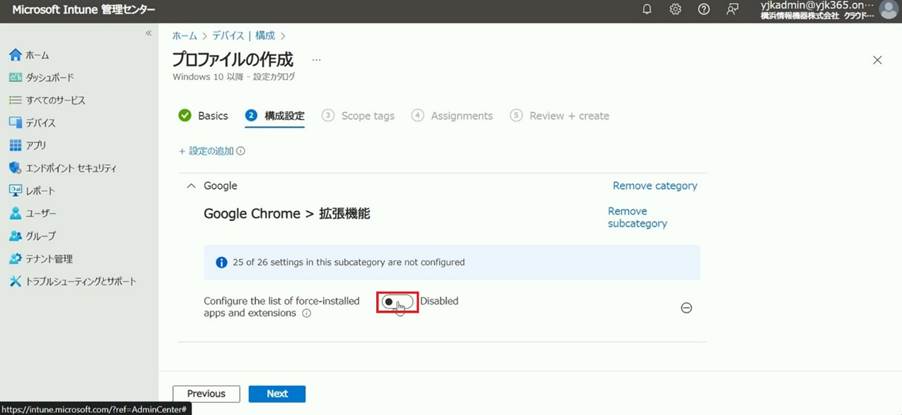
8.「Setting name」(日本語表記:「設定名」)より、「Configure the list of force-installed apps and extensions」にチェックを入れます。

9.一つ前の画面に戻り、「Configure the list of force-installed apps and extensions」のトグルボタンを「オン(Enabled)」にします。
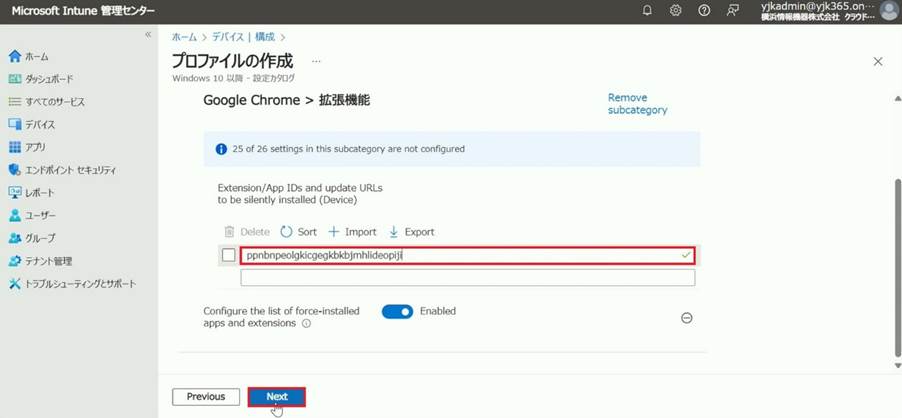
10.追加したい機能拡張を指定できる欄が表示するので、下記拡張子IDを入力し、「Next」(日本語表記:「次へ」)をクリックします。
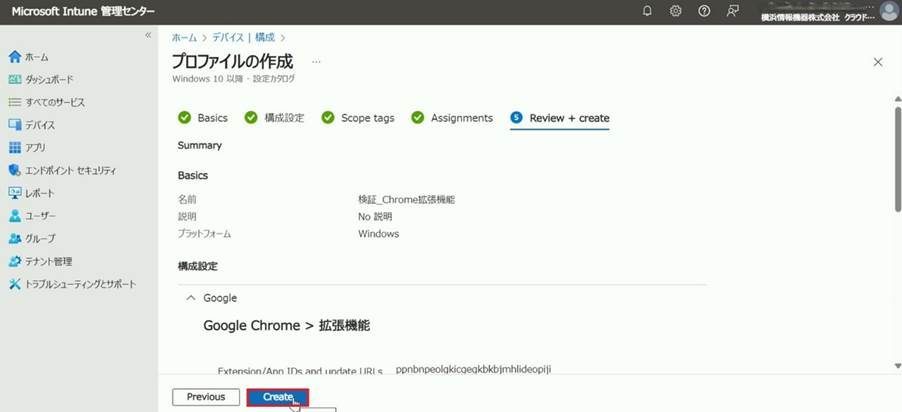
拡張子ID: ppnbnpeolgkicgegkbkbjmhlideopiji
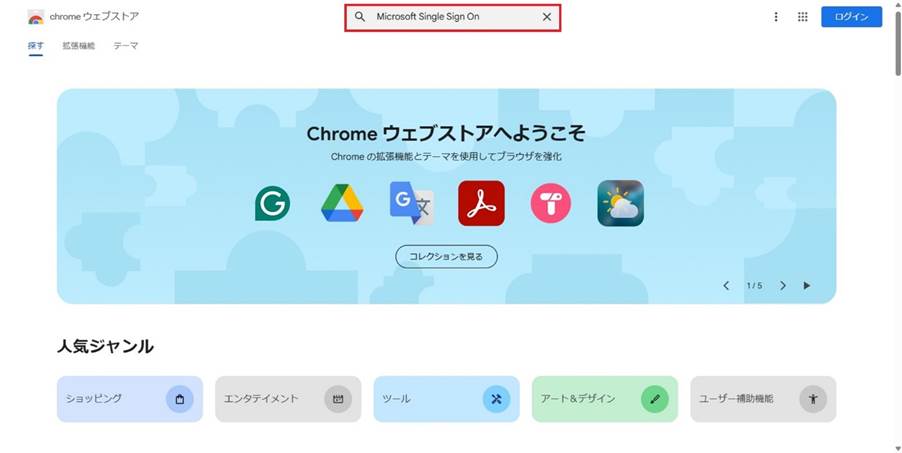
※拡張子IDの確認方法はいくつかありますが、今回はウェブからの確認方法を紹介します。
①.Chromeウェブストアを開き、検索欄に追加したい拡張機能(今回は「Microsoft Single Sign On」を追加します)を入力し、検索します。
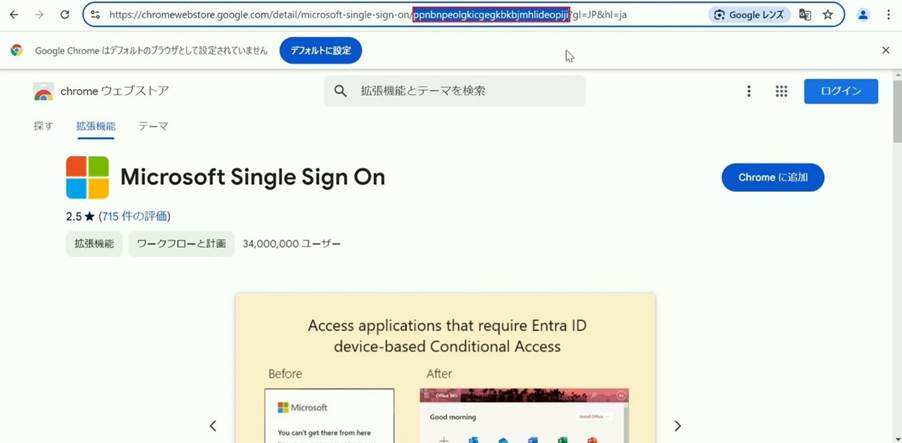
②.URL中の「microsoft-single-sign-on/」の後ろから「?」までの文字列(32文字)が拡張子IDになります。
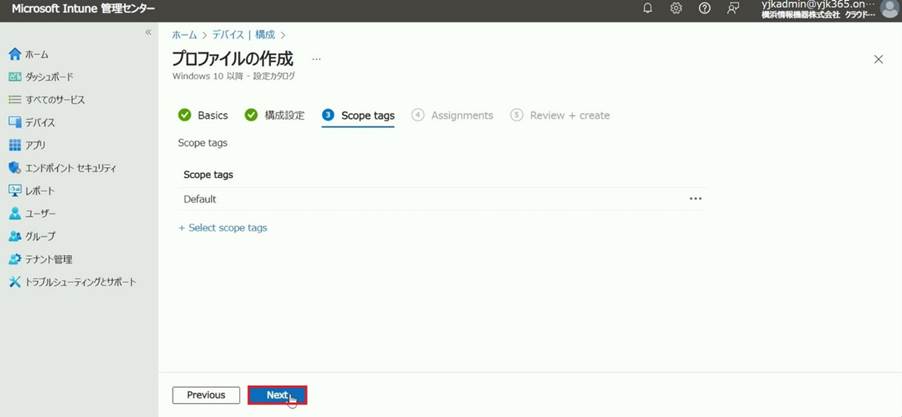
11.「Next」(日本語表記:「次へ」)をクリックします。
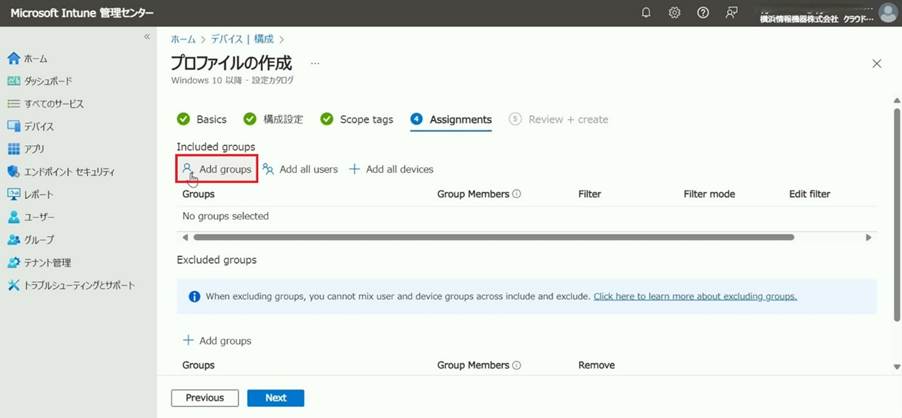
12.「Add groups」(日本語表記:「グループを追加」)をクリックします。
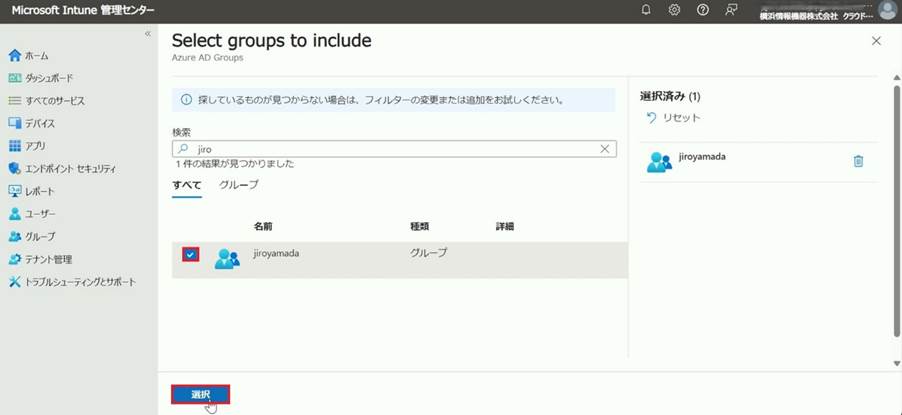
13.割り当てたいグループにチェックを入れ、「選択」をクリックします。
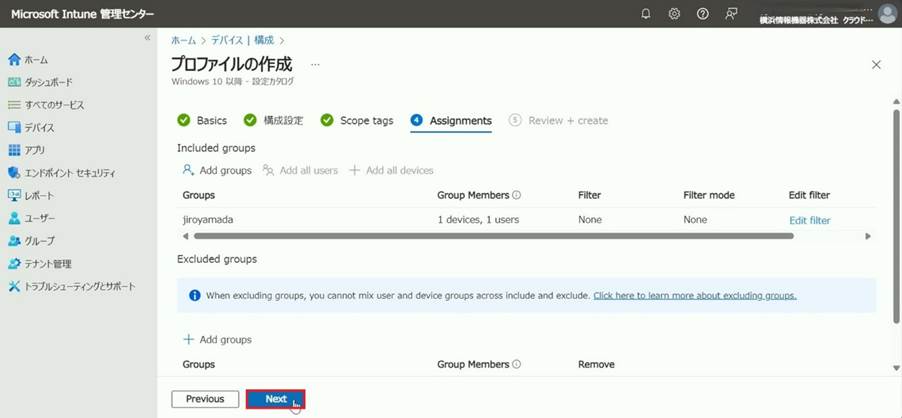
14.「Next」(日本語表記:「次へ」)をクリックします。
15.ポリシー内容を確認し、「Create」(日本語表記:「作成」)をクリックします。
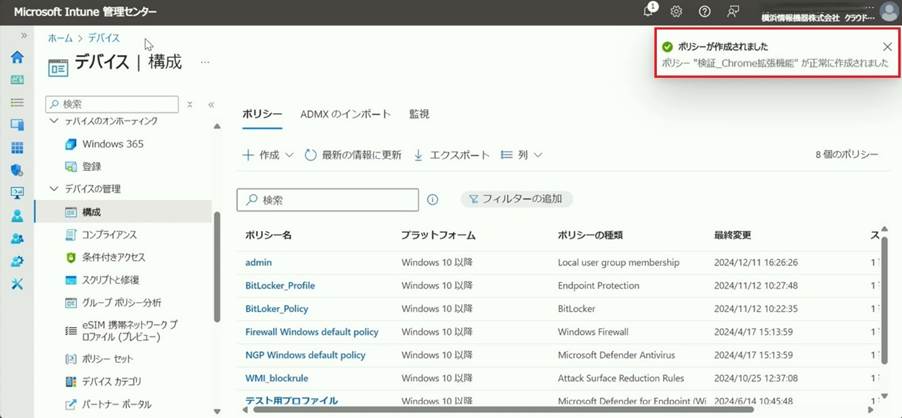
16.ポリシーが作成されました。
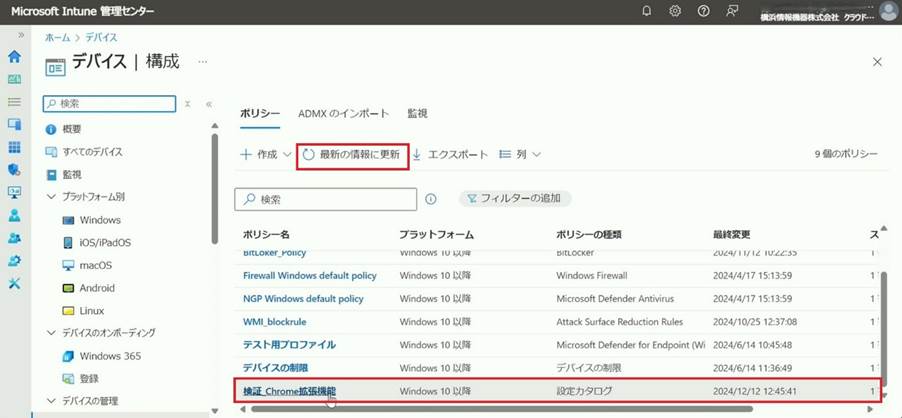
17.ポリシー一覧画面から「最新の情報に更新」をクリックし、新しいポリシーが反映したこと確認できました。
2.反映確認
■Google Chrome上でインストールされているかを確認
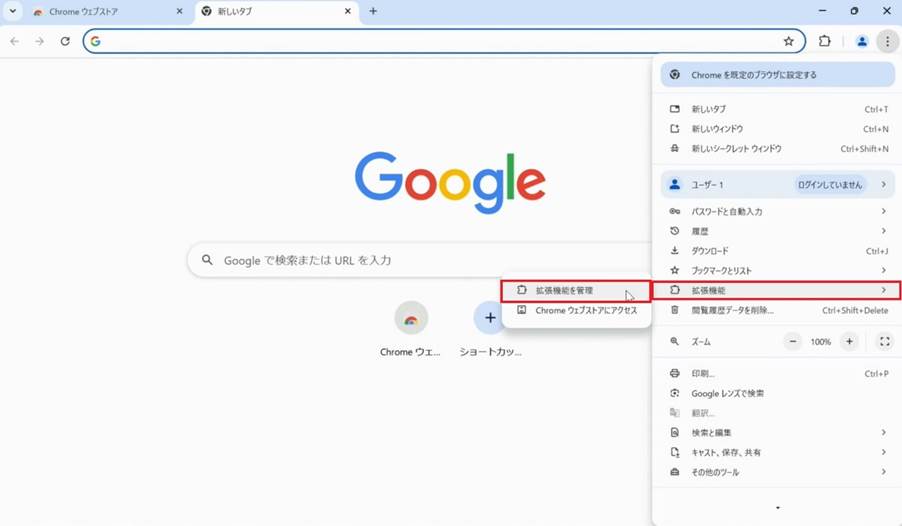
1.Google Chromeを開き、右上の…(三点リーダー)をクリックします。
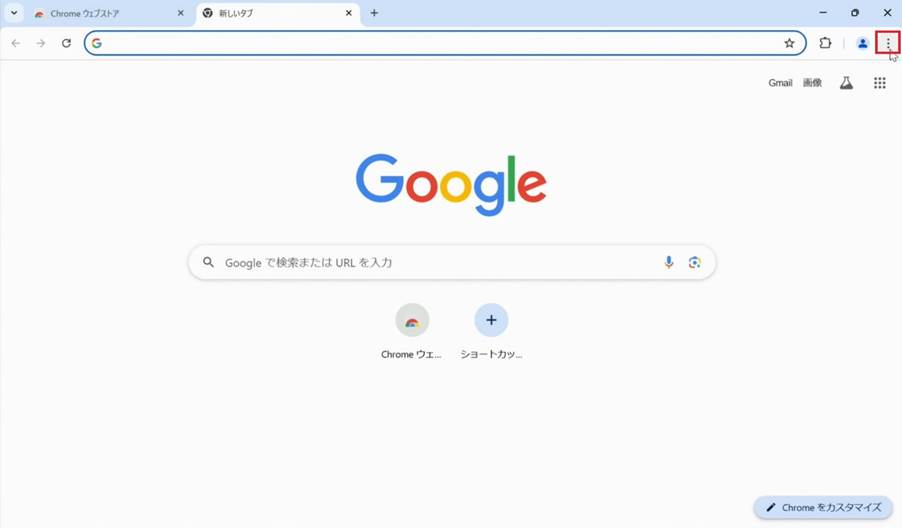
2.「拡張機能」をクリックし、「拡張機能を管理」をクリックします。
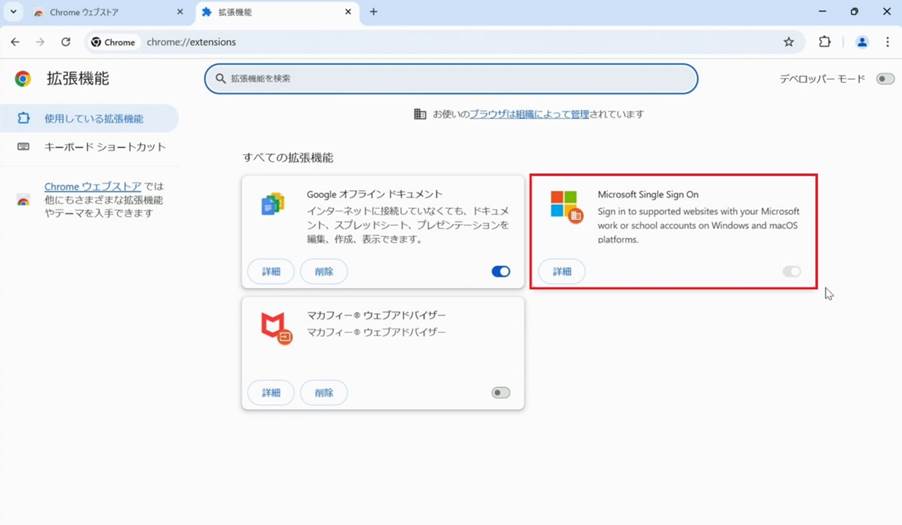
3.Microsoft Single Sign On拡張機能が自動にインストールされていること確認できました。
※注意点!
Microsoft Intune で設定したポリシーが管理対象デバイスのGoogle Chrome に反映されるまで、時間がかかる可能性ございます。すぐに反映を確認したい場合、対象デバイスで同期の実行を行うことをお勧めします。
下記ブログの「■設定結果をすぐに確認する方法(手動で即座に反映させる方法)」の項目で手順を記載しております。
IntuneでWiFiの手動設定を禁止する方法>3.トラブルシューティング>設定結果をすぐに確認する方法(手動で即座に反映させる方法)
■Microsoft Intune上でポリシーの状態を確認
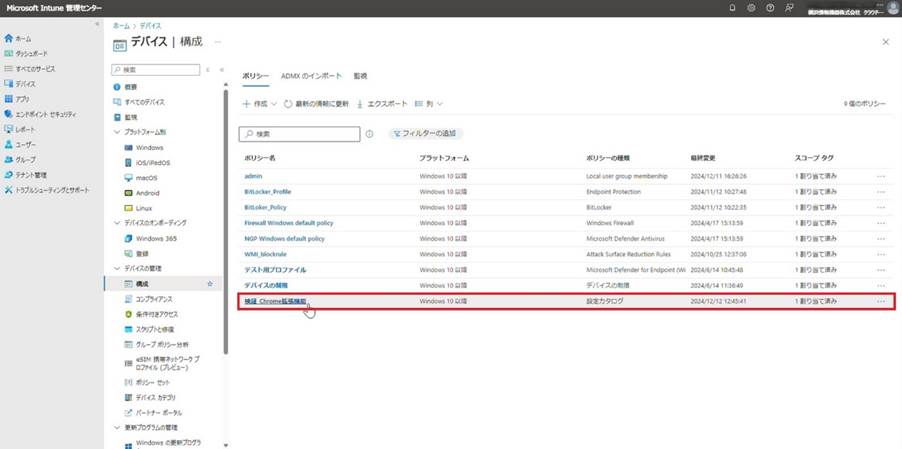
1. Microsoft Intune管理センターを開き、メニューバーから「デバイス」をクリックし、「構成」をクリックします。

2.作成したポリシーをクリックします。
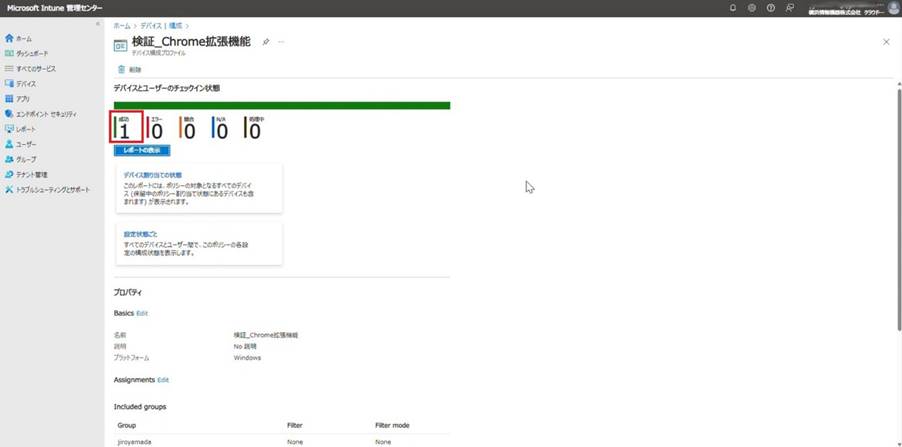
3.ポリシーで「成功」の状態になっていること確認できました。
3.まとめ
今回はMicrosoft IntuneでChromeの拡張機能を配布してみました。今回の方法だとグループにユーザーを追加しておくだけで拡張機能の配布ができるのでChromeをメインで使われている会社などではかなり有効な手順なのでは思いますので是非お試しいただければと思います。