この記事では Intuneでアプリを自動取得してアップデートする方法で使用するコマンドの正式アプリケーション名と直接ダウンロードリンクの調べ方をいくつかの例を挙げて解説します。
目次
1.正式アプリケーション名の調べ方
1.「メモ帳」を開き。下記スクリプトをコピー&ペーストします。
スクリプトの解説は、―スクリプトの解説をご覧ください 。
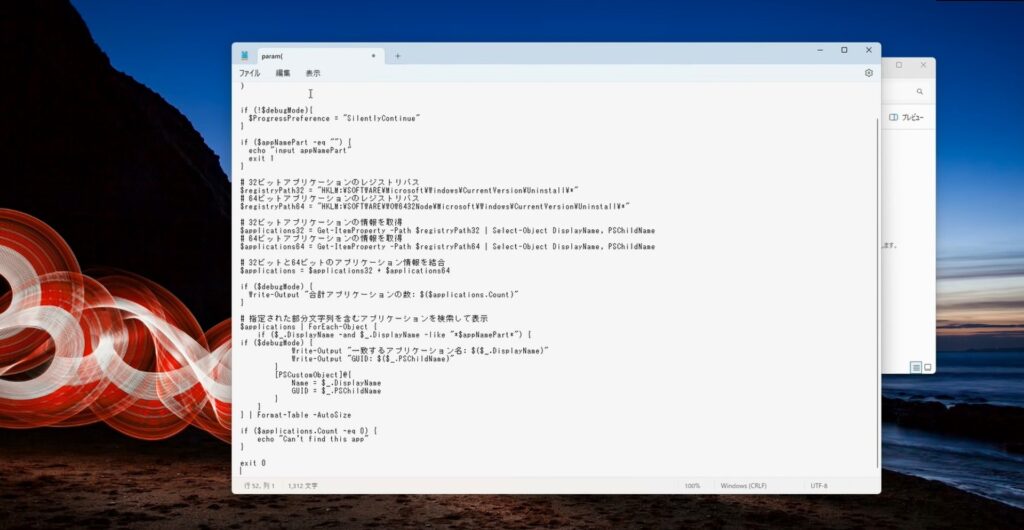
param(
[string]$appNamePart = "",
[switch]$debugMode = $false
)
if (!$debugMode){
$ProgressPreference = "SilentlyContinue"
}
if ($appNamePart -eq "") {
echo "input appNamePart"
exit 1
}
# 32ビットアプリケーションのレジストリパス
$registryPath32 = "HKLM:\SOFTWARE\Microsoft\Windows\CurrentVersion\Uninstall\*"
# 64ビットアプリケーションのレジストリパス
$registryPath64 = "HKLM:\SOFTWARE\WOW6432Node\Microsoft\Windows\CurrentVersion\Uninstall\*"
# 32ビットアプリケーションの情報を取得
$applications32 = Get-ItemProperty -Path $registryPath32 | Select-Object DisplayName, PSChildName
# 64ビットアプリケーションの情報を取得
$applications64 = Get-ItemProperty -Path $registryPath64 | Select-Object DisplayName, PSChildName
# 32ビットと64ビットのアプリケーション情報を結合
$applications = $applications32 + $applications64
if ($debugMode) {
Write-Output "合計アプリケーションの数: $($applications.Count)"
}
# 指定された部分文字列を含むアプリケーションを検索して表示
$applications | ForEach-Object {
if ($_.DisplayName -and $_.DisplayName -like "*$appNamePart*") {
if ($debugMode) {
Write-Output "一致するアプリケーション名: $($_.DisplayName)"
Write-Output "GUID: $($_.PSChildName)"
}
[PSCustomObject]@{
Name = $_.DisplayName
GUID = $_.PSChildName
}
}
} | Format-Table -AutoSize
if ($applications.Count -eq 0) {
echo "Can't find this app"
}
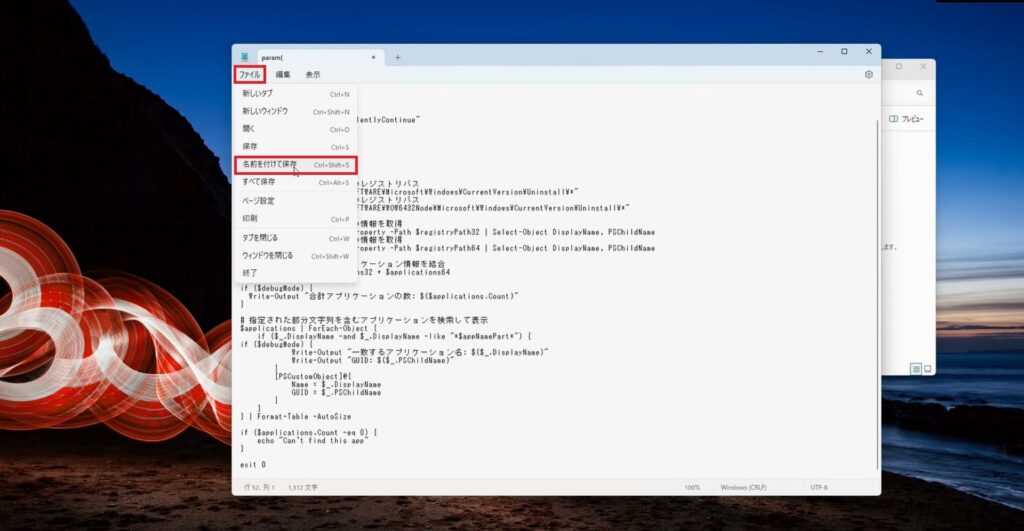
exit 0 2.「ファイル」をクリックし、「名前を付けて保存」をクリックします。
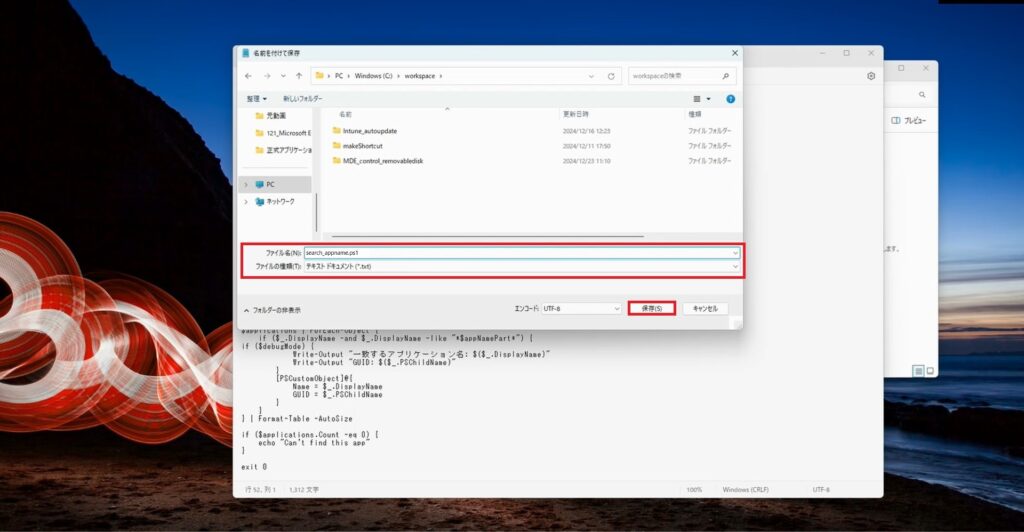
3.下記のように保存します。
ーーーーーーーーーーーーーーーーーーーーーーーーーーーーーーーーーーー
保存先:任意
ファイル名:任意(ここでは「search_appname.ps1」と入力します。)
ファイルの種類:任意(ここでは「テキスト ドキュメント」と指定します。)
ーーーーーーーーーーーーーーーーーーーーーーーーーーーーーーーーーーー
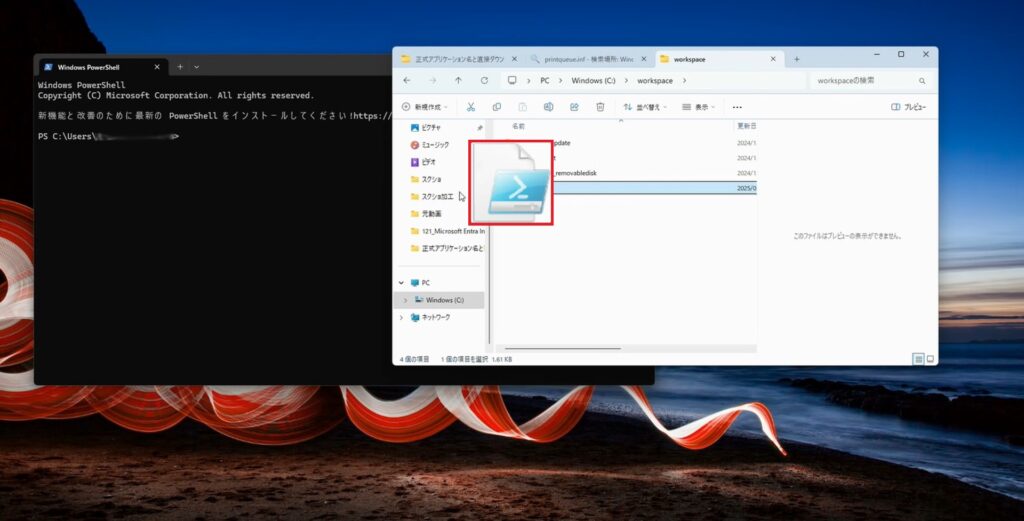
4.「Windows PowerShell」を開き、3.で保存したファイルを「PowerShell」にドラッグ&ドロップします。
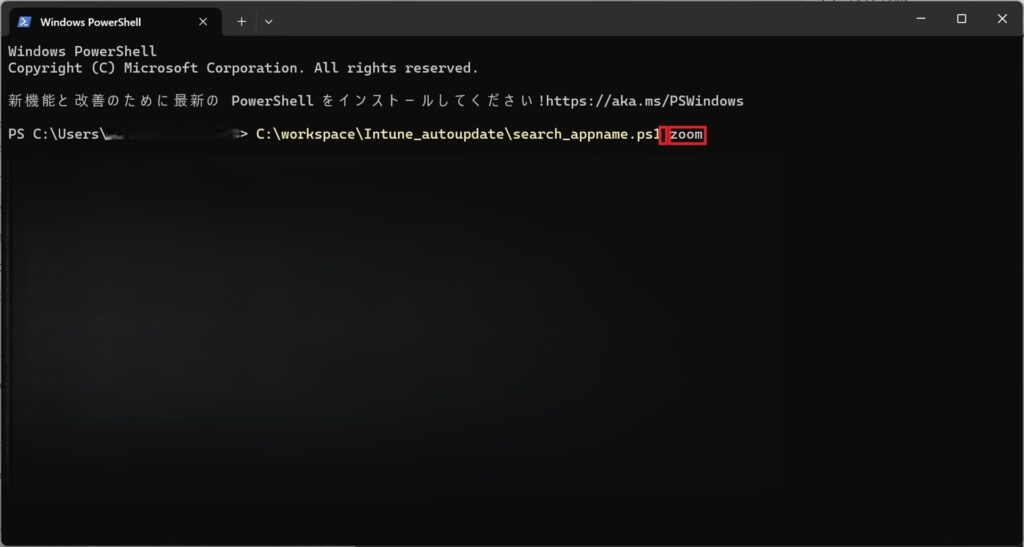
5.空白をあけて、正式アプリケーション名を検索したい、アプリケーションを指定します。
6.指定したプリケーションの正式アプリケーション名が出力されます。
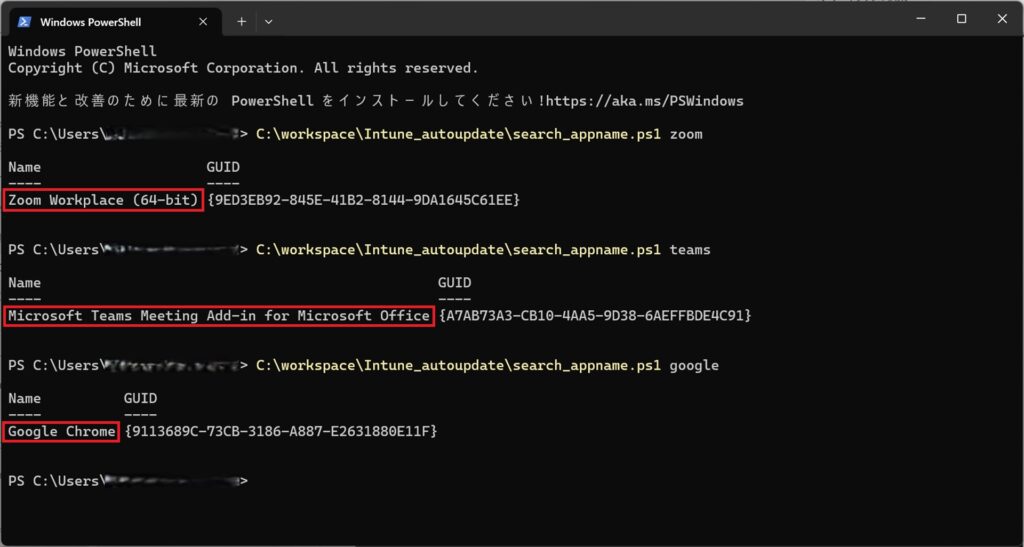
| 指定したアプリケーション | 正式アプリケーション名 |
| zoom | Zoom Workplace (64-bit) |
| teams | Microsoft Teams Meeting Add-in for Microsoft Office |
| Google Chrome |
ここで出力された正式アプリケーション名を下記青文字箇所に、Install command、Uninstall command に入力します。
| Install command | powershell -ExecutionPolicy Bypass “.\{ps1ファイルを指定} ‘{正式アプリケーション名を指定}’ ‘{調べたURLを指定}'” |
| Uninstall command | powershell -ExecutionPolicy Bypass “.\{ps1ファイルを指定} ‘{正式アプリケーション名を指定}’ -uninstall” |
-スクリプトの解説
このスクリプトは、システムにインストールされているアプリケーションを検索し、指定された名前の一部を含むアプリケーションを見つけ出すためのスクリプトです。
パラメータの定義
param(
[string]$appNamePart = “”,
[switch]$debugMode = $false
)
- $appNamePart: 検索するアプリケーション名の一部を指定する文字列パラメータ。
- $debugMode: デバッグモードを有効にするスイッチパラメータ。
プログレスバーの設定
if (!$debugMode){
$ProgressPreference = “SilentlyContinue”
}
デバッグモードが無効な場合、プログレスバーの表示を抑制します。
入力チェック
if ($appNamePart -eq “”) {
echo “input appNamePart”
exit 1
}
$appNamePartが空の場合、エラーメッセージを表示してスクリプトを終了します。
レジストリパスの定義
$registryPath32 = “HKLM:\SOFTWARE\Microsoft\Windows\CurrentVersion\Uninstall\*”
$registryPath64 = “HKLM:\SOFTWARE\WOW6432Node\Microsoft\Windows\CurrentVersion\Uninstall\*”
32ビットおよび64ビットアプリケーションのレジストリパスを定義します。
アプリケーション情報の取得
$applications32 = Get-ItemProperty -Path $registryPath32 | Select-Object DisplayName, PSChildName
$applications64 = Get-ItemProperty -Path $registryPath64 | Select-Object DisplayName, PSChildName
32ビットおよび64ビットアプリケーションの情報をレジストリから取得します。
アプリケーション情報の結合
$applications = $applications32 + $applications64
32ビットと64ビットのアプリケーション情報を結合します。
デバッグモードでの出力
if ($debugMode) {
Write-Output “合計アプリケーションの数: $($applications.Count)”
}
デバッグモードが有効な場合、取得したアプリケーションの総数を出力します。
アプリケーションの検索と表示
$applications | ForEach-Object {
if ($_.DisplayName -and $_.DisplayName -like “*$appNamePart*”) {
if ($debugMode) {
Write-Output “一致するアプリケーション名: $($_.DisplayName)”
Write-Output “GUID: $($_.PSChildName)”
}
[PSCustomObject]@{
Name = $_.DisplayName
GUID = $_.PSChildName
}
}
} | Format-Table -AutoSize
- 指定された部分文字列を含むアプリケーションを検索し、見つかった場合はその名前とGUIDを表示します。
- デバッグモードが有効な場合は、追加のデバッグ情報も出力します。
アプリケーションが見つからない場合の処理
if ($applications.Count -eq 0) {
echo “Can’t find this app”
}
アプリケーションが見つからない場合、エラーメッセージを表示します。
スクリプトの終了
exit 0
スクリプトを正常終了します。
2.直接ダウンロードリンクの調べ方
ここではZoomとSlackで例を挙げています。
Zoomの場合
1.ブラウザで「zoom インストーラ」で検索し、Zoom公式HPのインストーラのページにアクセスし、「ミーティング用 Zoom デスクトップ クライアント – MSI インストーラ」を右クリックします。
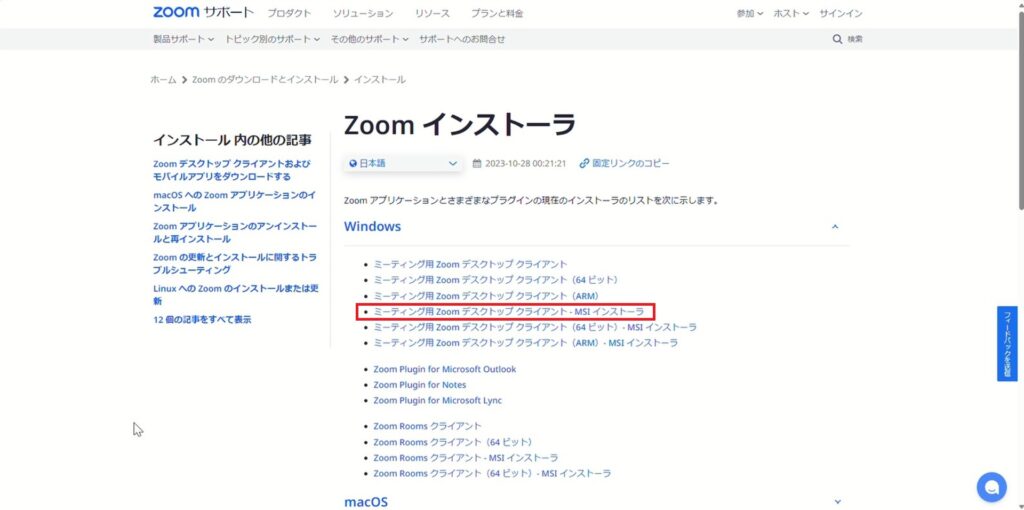
2.「リンクのコピー」をクリックします。
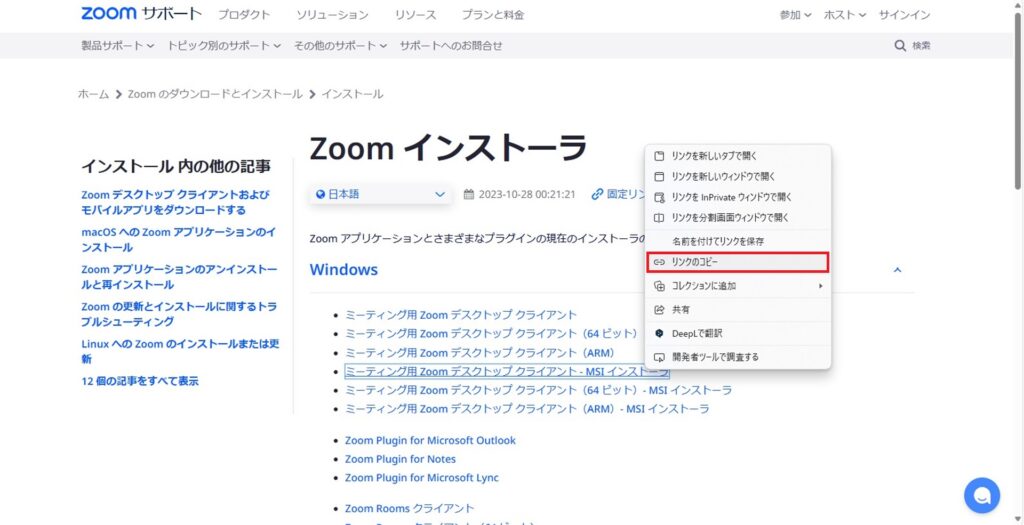
3.コピーしたリンクがZoomの直接ダウンロードリンクになります。
| Zoom直接ダウンロード リンク | https://zoom.us/client/latest/ZoomInstallerFull.msi |
ここで出力された直接ダウンロードリンクを下記青文字箇所に、Install commandに入力します。
| Install command | powershell -ExecutionPolicy Bypass “.\{ps1ファイルを指定} ‘{正式アプリケーション名を指定}’ ‘{調べたURLを指定}'” |
Slackの場合
Zoomのように安易にダウンロードリンクを探せないときは、開発者モードを使用してネットワークタブでリンクを探します。
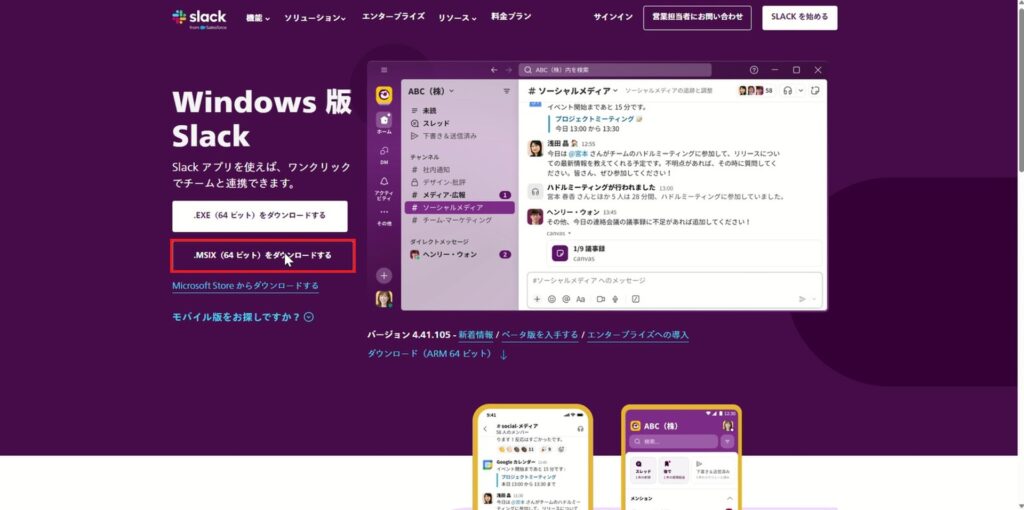
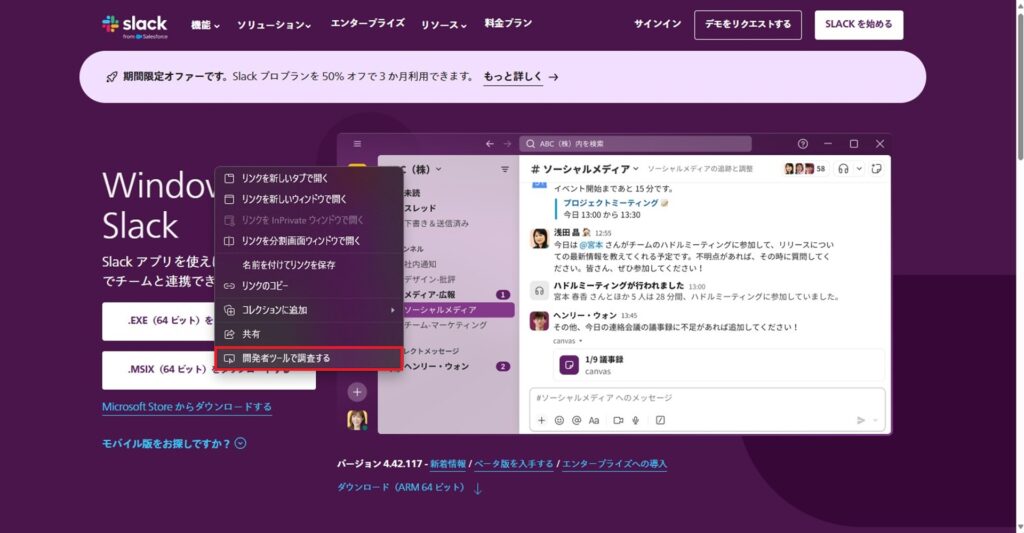
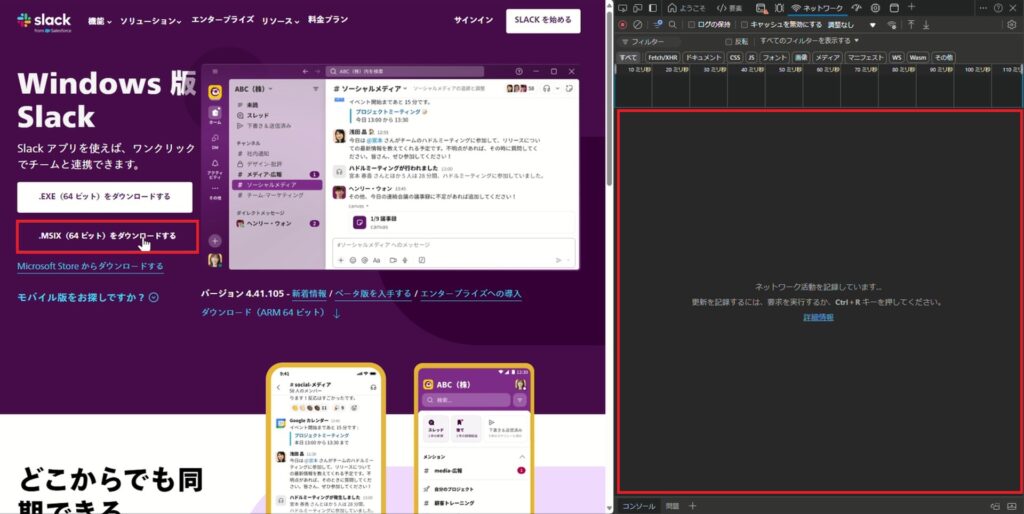
1.ブラウザで「slack ダウンロード」で検索し、Slack公式HPのダウンロードページにアクセスし、「.MSIX(64ビット)をダウンロードする」を右クリックします。
2.「開発者ツールで調査する」をクリックします。
3.右に表示された開発者ツールの上に各タブがあり、「ネットワーク」タブをクリックします。※ネットワークタブでは Webページが発行したネットワークリクエストの詳細情報が表示され、リクエストのURLやメソッド、HTTPステータスコードなどの詳細情報が確認できます。
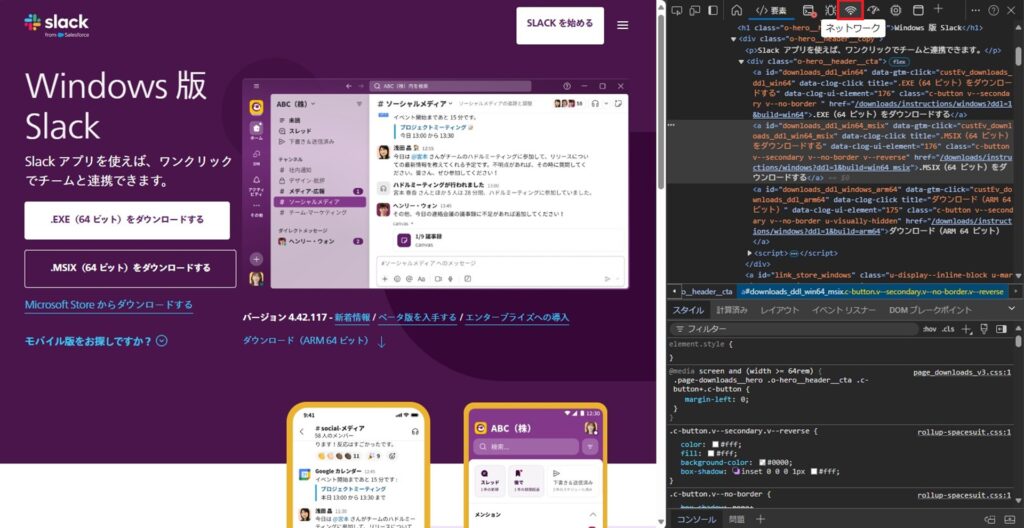
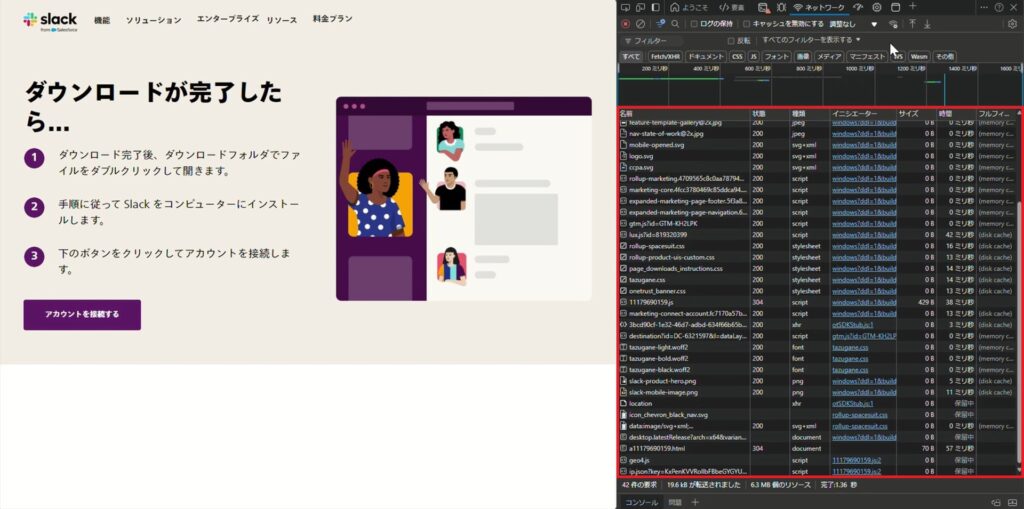
4.まだアクションは実行していないので右の赤枠は空欄のままです。 「.MSIX(64ビット)をダウンロードする 」をクリックします。
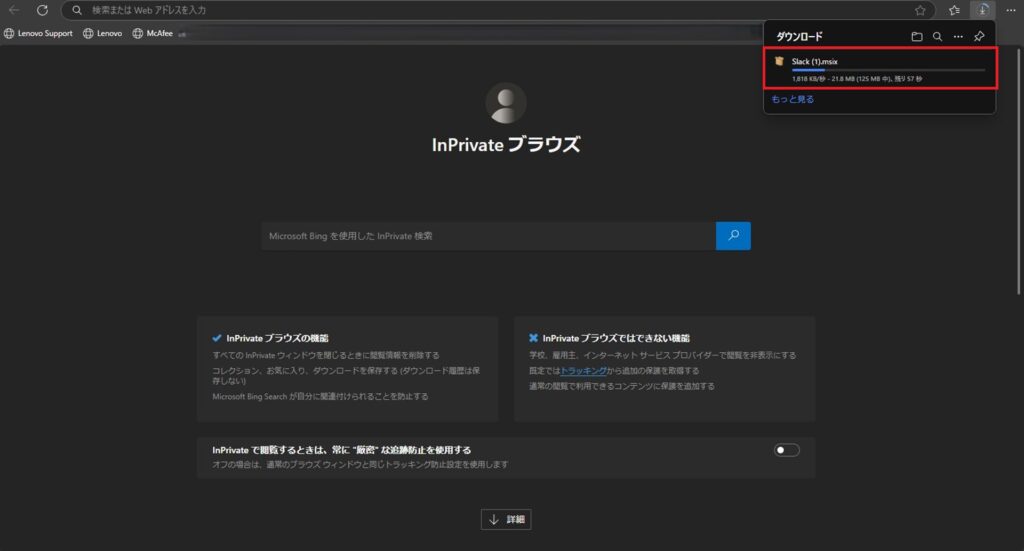
5.ダウンロードが開始したら、次々とログが記録されます。
6.フィルターで「.msix download」と検索し、検索結果で出てきた「Slack.msix」の「要求URL」がSlack の直接ダウンロードリンクになります。
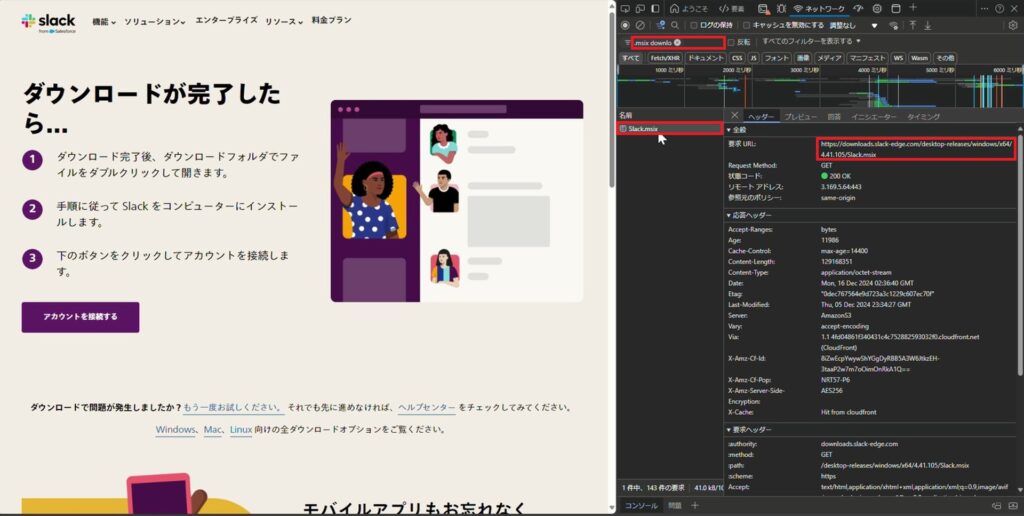
| Slack直接ダウンロードリンク | https://downloads.slack-edge.com/desktop-releases/windows/x64/4.42.117/Slack.msix |
ここで出力された直接ダウンロードリンクを下記青文字箇所に、Install commandに入力します。
| Install command | powershell -ExecutionPolicy Bypass “.\{ps1ファイルを指定} ‘{正式アプリケーション名を指定}’ ‘{調べたURLを指定}'” |
※直接ダウンロードリンクの見分け方も簡単に解説します!
調べたURLをブラウザで検索します。
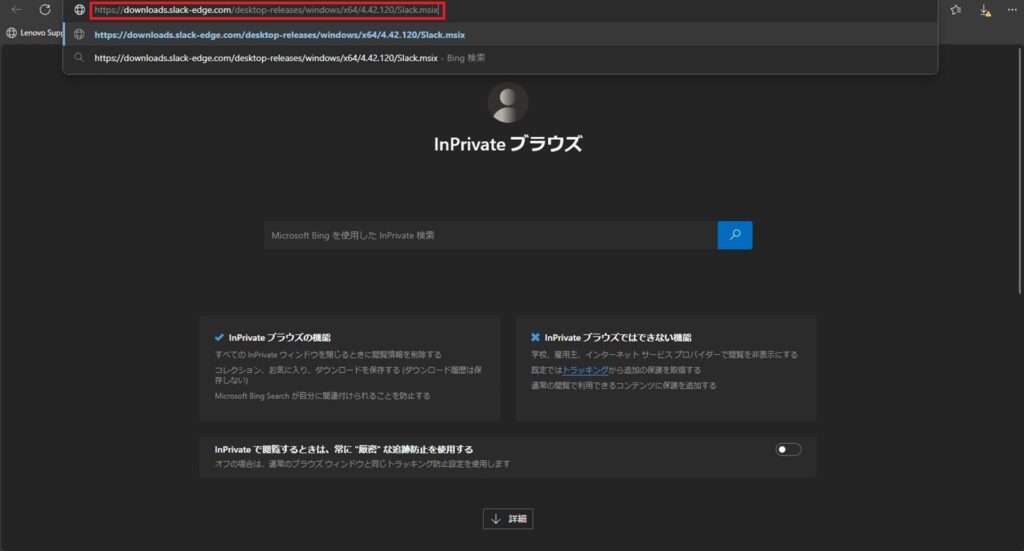
すぐにファイルのダウンロードが始まったら、その検索したURLが直接ダウンロードリンクになります。
その他お困りごとも動画で解説!