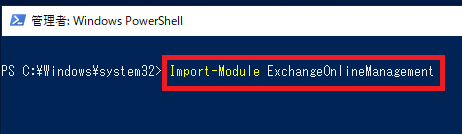
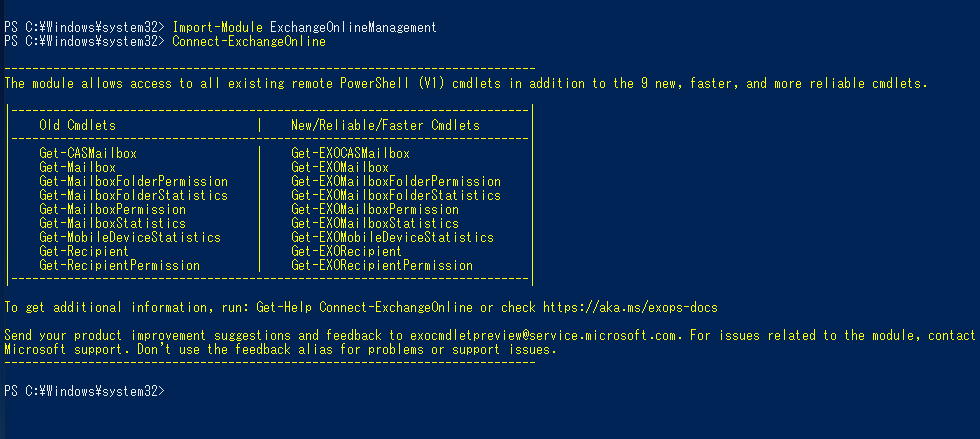
1.Windows PowerShellを管理者で起動して、下記コマンドを実行し、モジュールをインポートします。
Import-Module ExchangeOnlineManagement
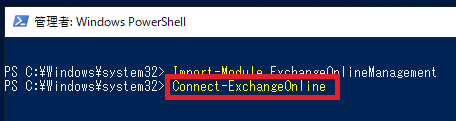
![](https://yjk365.jp/wp-content/uploads/2022/09/001.png)
2.下記コマンドを実行し、接続します。
Connect-ExchangeOnline
![](https://yjk365.jp/wp-content/uploads/2022/09/002.png)
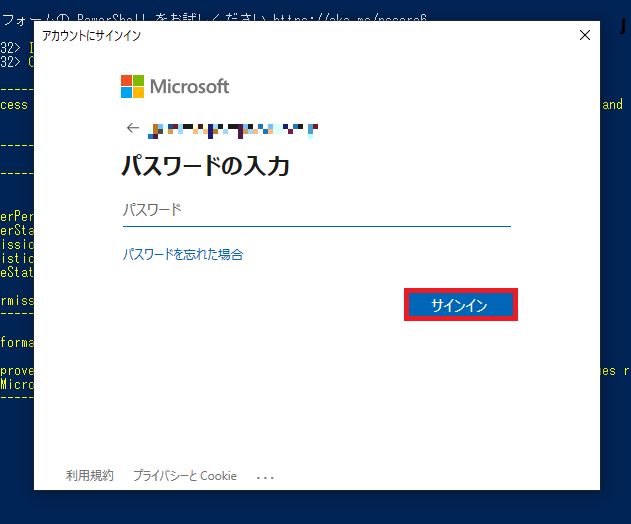
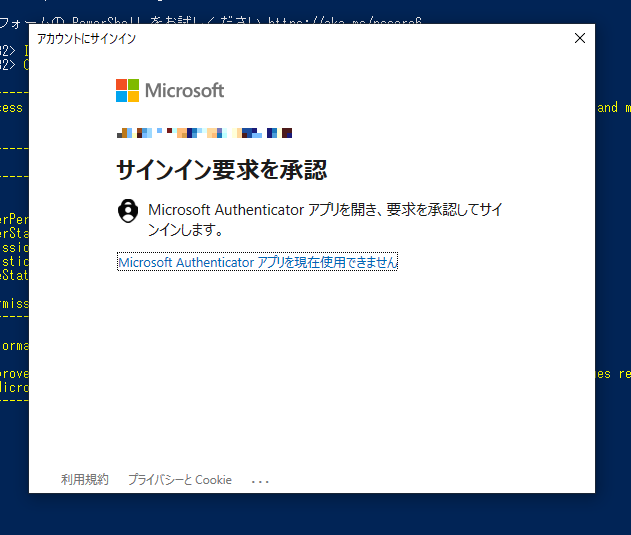
3.パスワードを入力して「サインイン」をクリックします。
![](https://yjk365.jp/wp-content/uploads/2022/09/003.png)
![](https://yjk365.jp/wp-content/uploads/2022/09/004.png)
![](https://yjk365.jp/wp-content/uploads/2022/09/005-1.png)
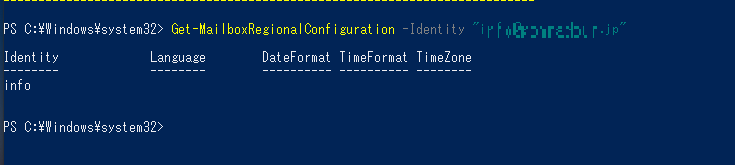
4.下記コマンドで現在の状況を確認します。
Get-MailboxRegionalConfiguration -Identity “<Shared_mailbox_name>”
![](https://yjk365.jp/wp-content/uploads/2022/09/006.png)
現時点では何も設定されていません。
![](https://yjk365.jp/wp-content/uploads/2022/09/007-2.png)
5.下記コマンドを実行し、日本時間の設定を行います。
Set-MailboxRegionalConfiguration -Identity “<Shared_mailbox_name>”
-TimeZone “Tokyo Standard Time”
![](https://yjk365.jp/wp-content/uploads/2022/09/008-2.png)
6.下記コマンドを実行し、言語を日本語にします。
Set-MailboxRegionalConfiguration -Identity “<Shared_mailbox_name>”-language “ja-jp”
![](https://yjk365.jp/wp-content/uploads/2022/09/009-2.png)
7.下記コマンドを実行し、反映されているか確認します。
Get-MailboxRegionalConfiguration -Identity “<Shared_mailbox_name>”
![](https://yjk365.jp/wp-content/uploads/2022/09/010-1.png)
TimeZoneが「Tokyo Standard Time」、Languageが「ja-JP」になっていれば完了です。
![](https://yjk365.jp/wp-content/uploads/2022/09/011.png)
その他お困りごとも動画で解説!
![](https://yjk365.jp/wp-content/uploads/2024/01/サムネイル変更4-174.jpg)